
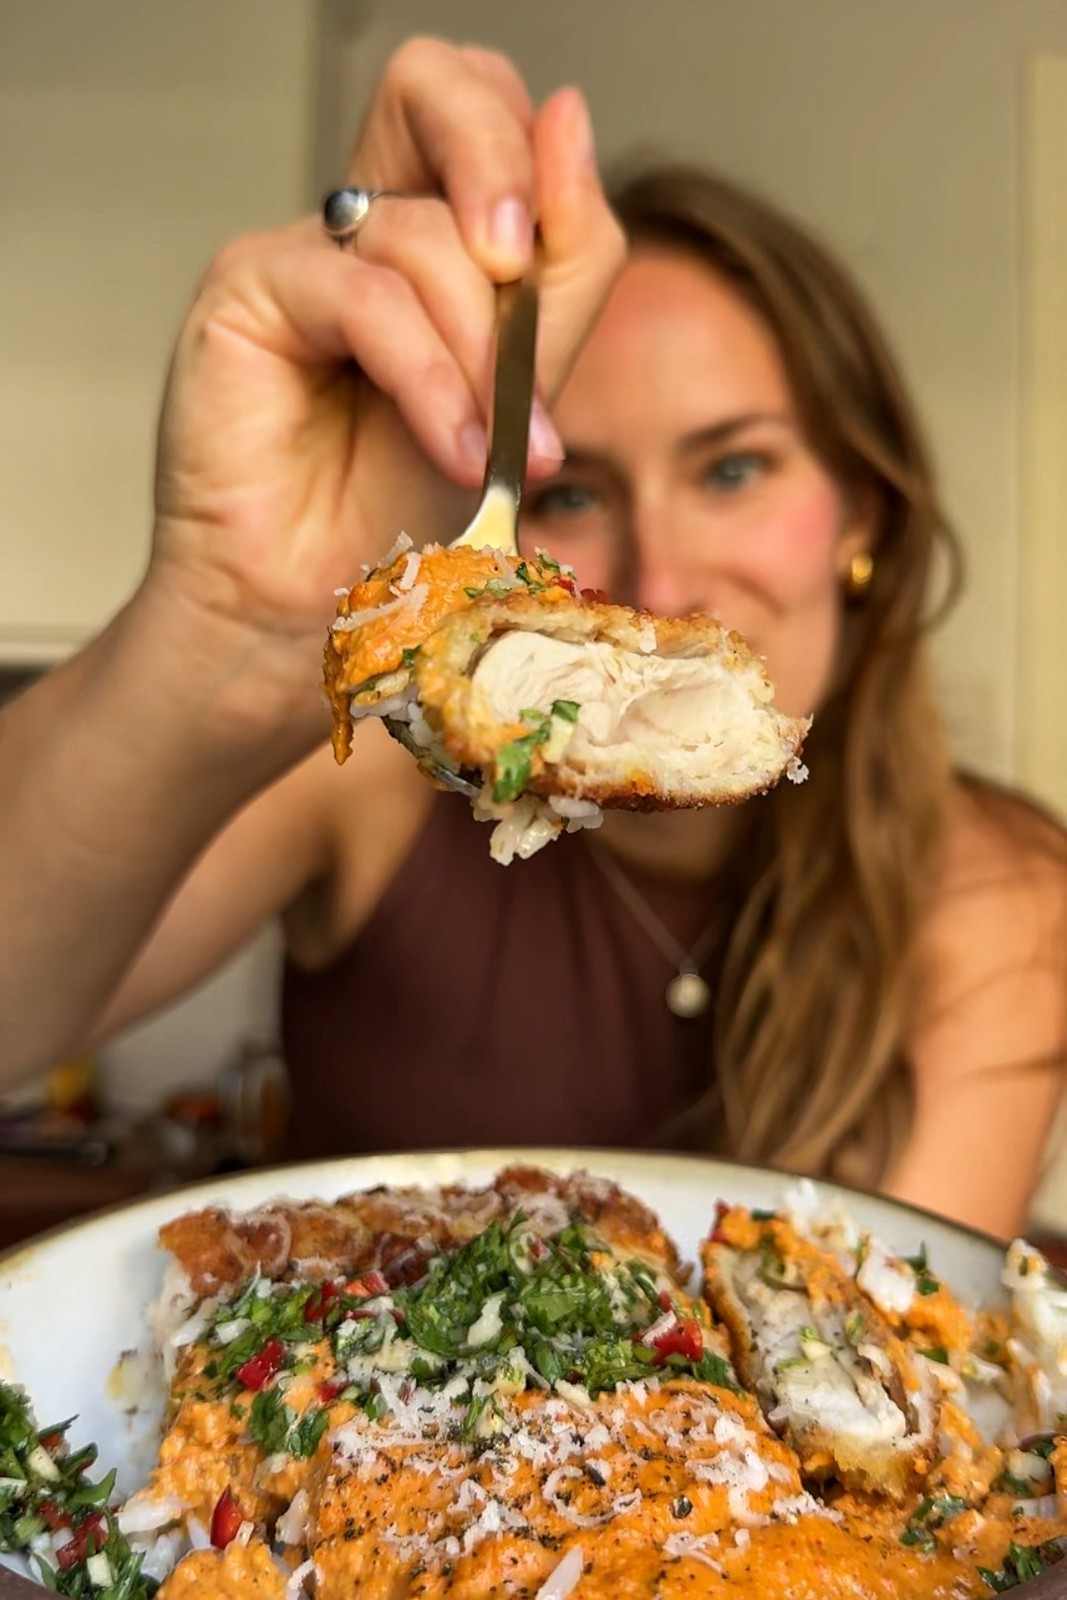
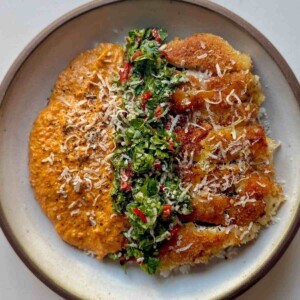
My crispy romesco chicken is a smoky, sweet and satisfying chicken and rice dish that has become a real weeknight staple. Panko-coated chicken thighs are pan-fried until they turn deep golden and served over rice with a homemade romesco sauce and a sharp cilantro and chili dressing. Coating the chicken twice builds a thicker crust that stays crunchy under the sauce. It takes about 35 minutes to make and serves two.
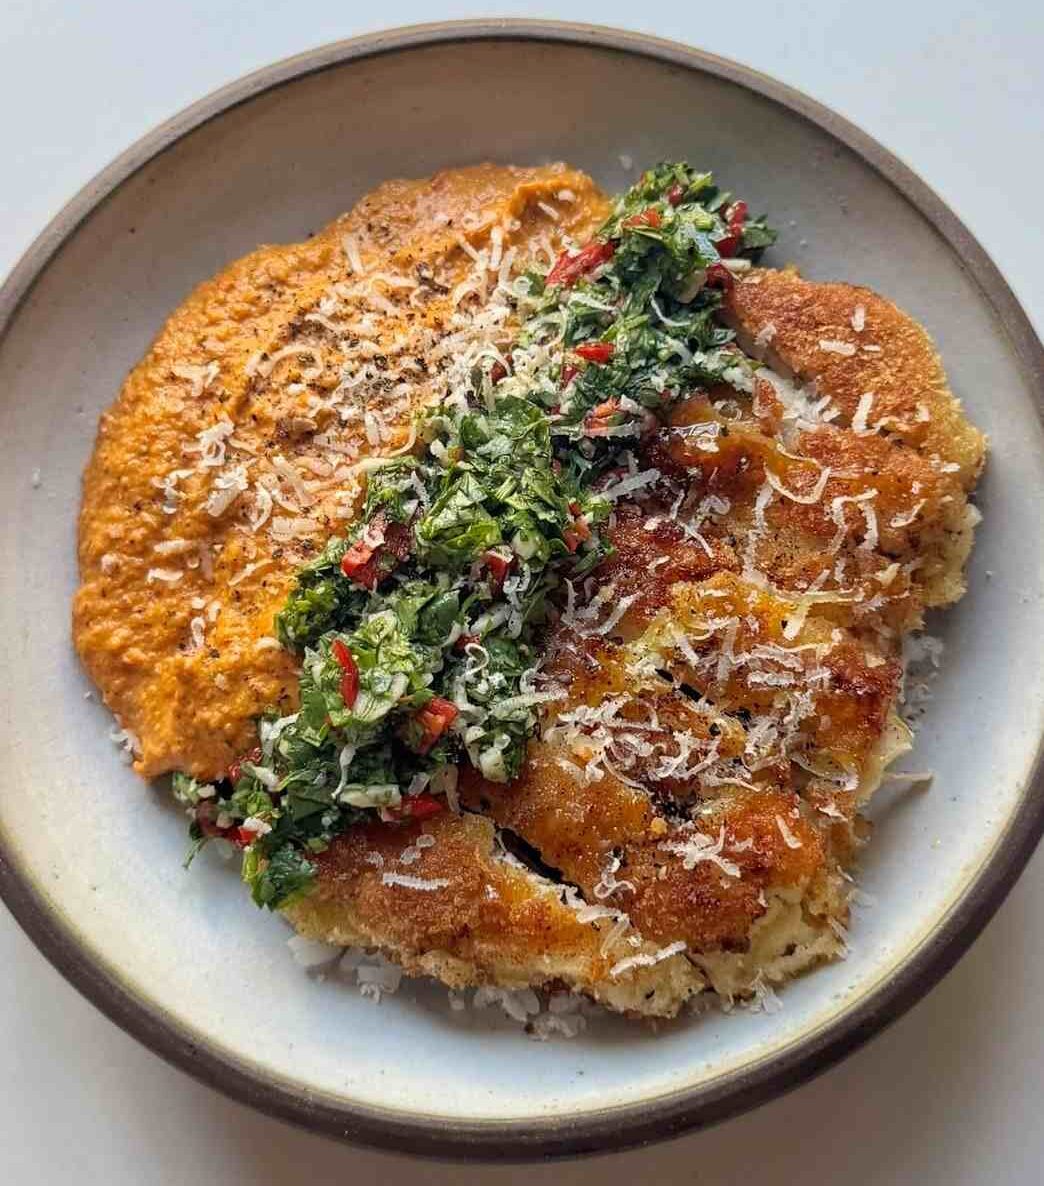
I've made romesco before on the blog, for my popular crunchy chicken romesco sandwich, and I've kept a jar of roasted red peppers in the pantry ever since (not the same one obviously). It's really one of the sauces that tastes like it took ages to make, but in fact all you need is 5 minutes and a blender! This time however, instead of going in a delicious focaccia sandwich we'll be serving it with crispy chicken on one side and a punchy green sauce down the middle, with rice!!
The one thing I do differently to most breaded chicken recipes is coat the chicken twice. Flour, egg, panko, then straight back through all three again. I find that a single layer of panko softens the moment it meets a wet sauce, and this whole plate is built around a sauce so it needs to keep its crunch.
If this is your sort of thing, my roasted red pepper chicken uses the same peppers in a creamy cottage cheese sauce, and my one pot marry me chicken and rice is a lazier version where the rice cooks in the pan.
Jump to:
- What is romesco sauce?
- Ingredients for crispy romesco chicken
- How to make crispy romesco chicken (7 easy steps with photos)
- Tips for the best crispy romesco chicken
- Substitutions and variations
- Storage, freezing and reheating
- Crispy romesco chicken FAQs
- More crispy chicken and rice recipes
- Crispy Romesco Chicken With Rice
What is romesco sauce?
Romesco is a Catalan sauce from northeastern Spain, traditionally made by pounding roasted peppers, toasted nuts and garlic together with olive oil and vinegar. The classic version uses dried ñora peppers and a mix of almonds and hazelnuts, and it's thickened with stale or fried bread. Apparently fishermen around Tarragona made it to go with fish, and from winter into spring in Catalonia there are outdoor parties called calçotada built around grilling sweet green onions over a fire and dipping them into a sauce just like it. So it's fair to say it's a very popular sauce!
Mine, however, is a bit of a shortcut.
My recipe uses jarred roasted bell peppers instead of ñoras, almonds on their own, sun-dried tomatoes for concentrated sweetness, and no bread at all. However, for a quick weeknight dinner I think it hits just the right spot!
The almonds do the thickening, which is why the sauce stays slightly chunky rather than smooth. It tastes smoky and sweet from the peppers and paprika, savory from the tomatoes, rich from the almonds, with a sharp balsamic edge that stops it feeling heavy.
Ingredients for crispy romesco chicken
There are three main components to this dish, but don't worry, the shopping list is short and most of it is pantry stuff.
- Chicken thighs: Boneless and skinless. Thighs stay juicy through a 10 minute fry in a way breasts don't, and their uneven surface gives the panko more to grip.
- Seasoned flour: Salt and pepper the flour; it's the only chance the chicken itself gets seasoned, so be more generous than feels right.
- Panko breadcrumbs: Not regular dried breadcrumbs. Panko flakes are bigger and drier, which is exactly why they stay crunchy under a sauce.
- Roasted bell peppers: The jarred kind, drained. Already soft and smoky, so there's no roasting to do.
- Sun-dried tomatoes: The ones packed in oil rather than the dry leathery ones. They blend more easily and bring more flavor.
- Almonds: Blanched or skin-on both work. They thicken the sauce as well as flavor it, so don't reduce them.
- Cilantro: The green sauce is mostly cilantro, so if it tastes like soap to you, flat-leaf parsley is the fix.
- Jasmine rice: Cooked and warm. Its softness is doing real work here, catching both sauces and balancing the crunch.
- Parmesan: Grated finely over everything at the end. Not traditional with romesco, but the salt is what pulls the three components together in my opinion.
For the full ingredient list with measurements, scroll down to the recipe card.
How to make crispy romesco chicken (7 easy steps with photos)
Step 1. Set up your dredging station
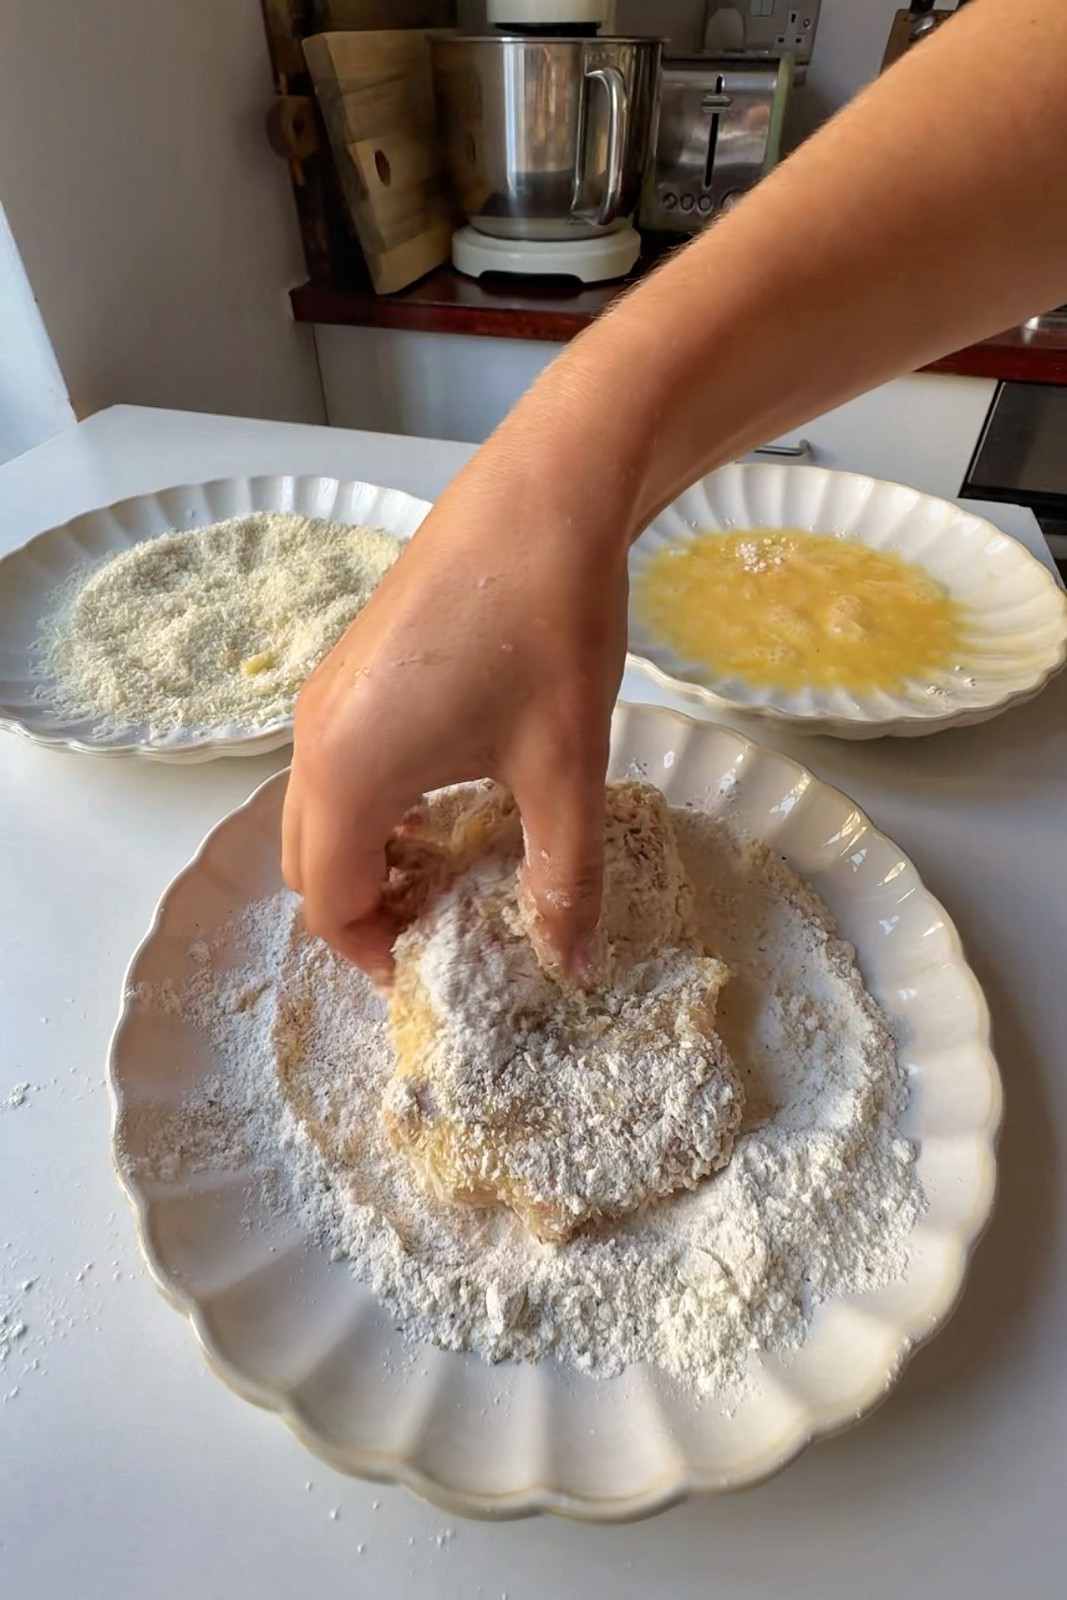
Get three plates out before you touch the chicken. One with flour seasoned with salt and pepper, one with a cracked egg whisked until no streaks of white are left, and one with panko. Line them up in that order so only one hand gets messy.
Step 2. Coat the chicken twice
Press a thigh into the flour on both sides, shake off the excess, dip it in the egg, then press it firmly into the panko. Now do all three again. The second coat is what gives you that thick, craggy crust. Set aside and repeat with the other thigh.
Step 3. Fry the chicken
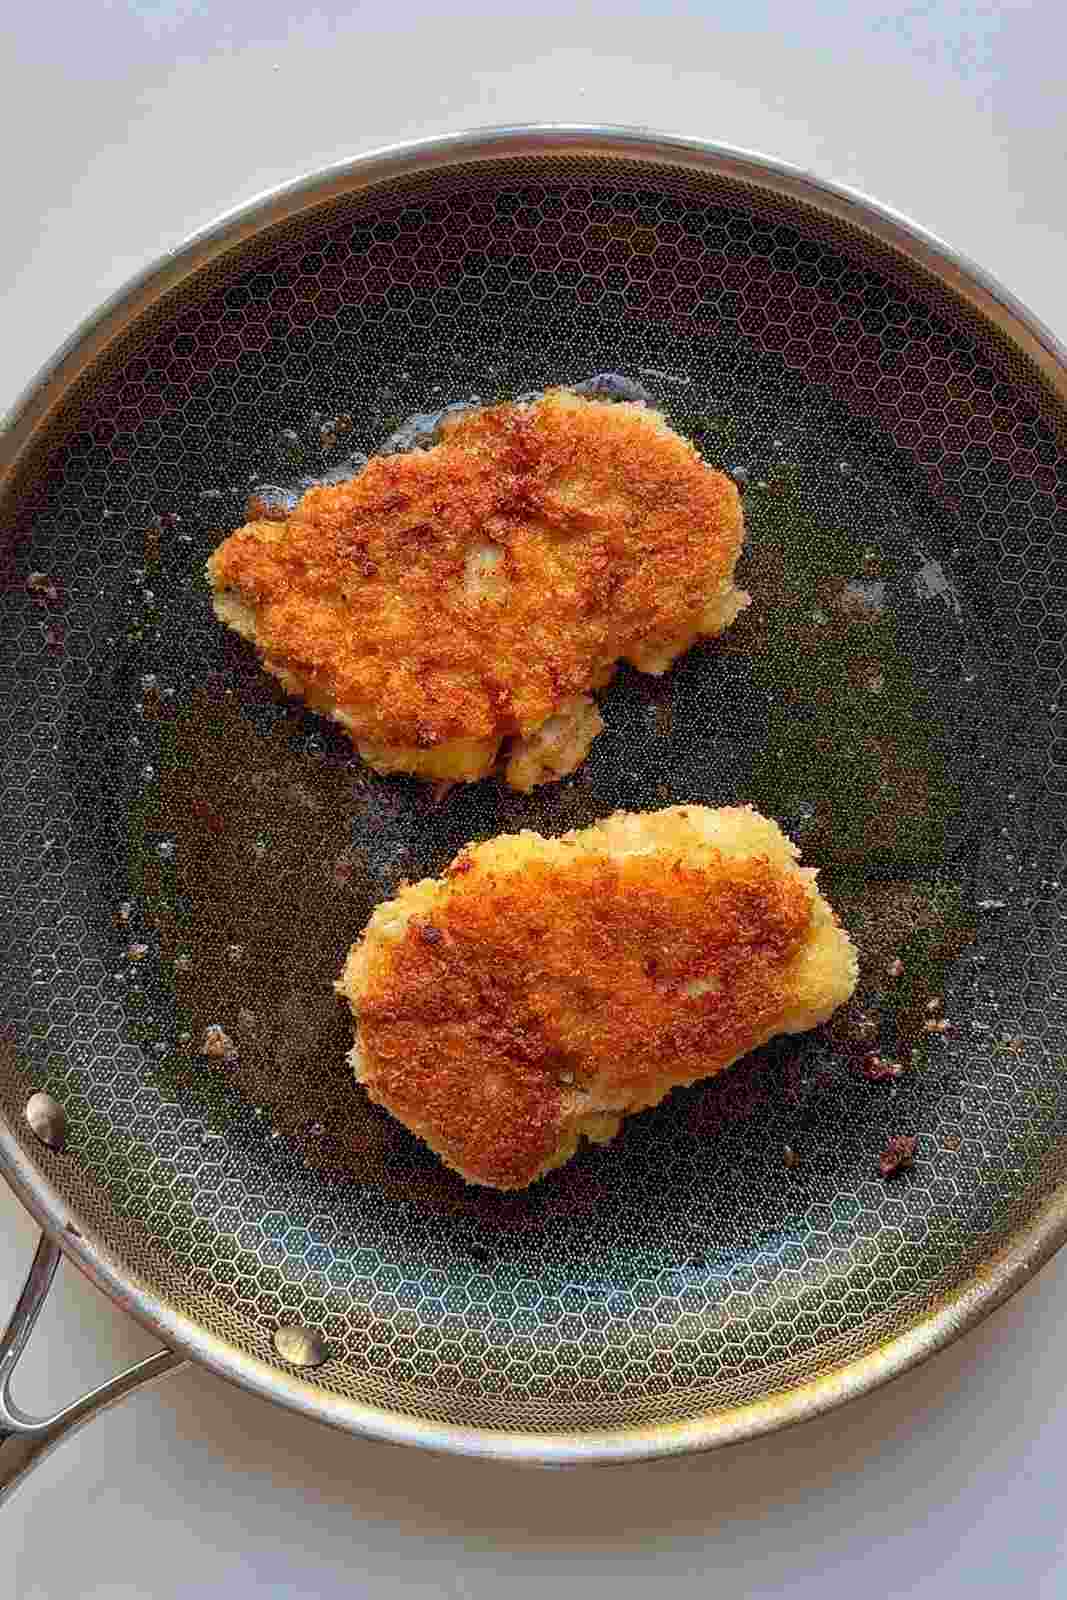
Pour enough vegetable oil into a large skillet to cover the base and set it over medium heat. To check it's hot, stand a wooden chopstick in the pan touching the base. If bubbles form around it, you're ready. Fry for 5 minutes a side until deep golden, dropping the heat if it colors too fast. Drain on paper towels.
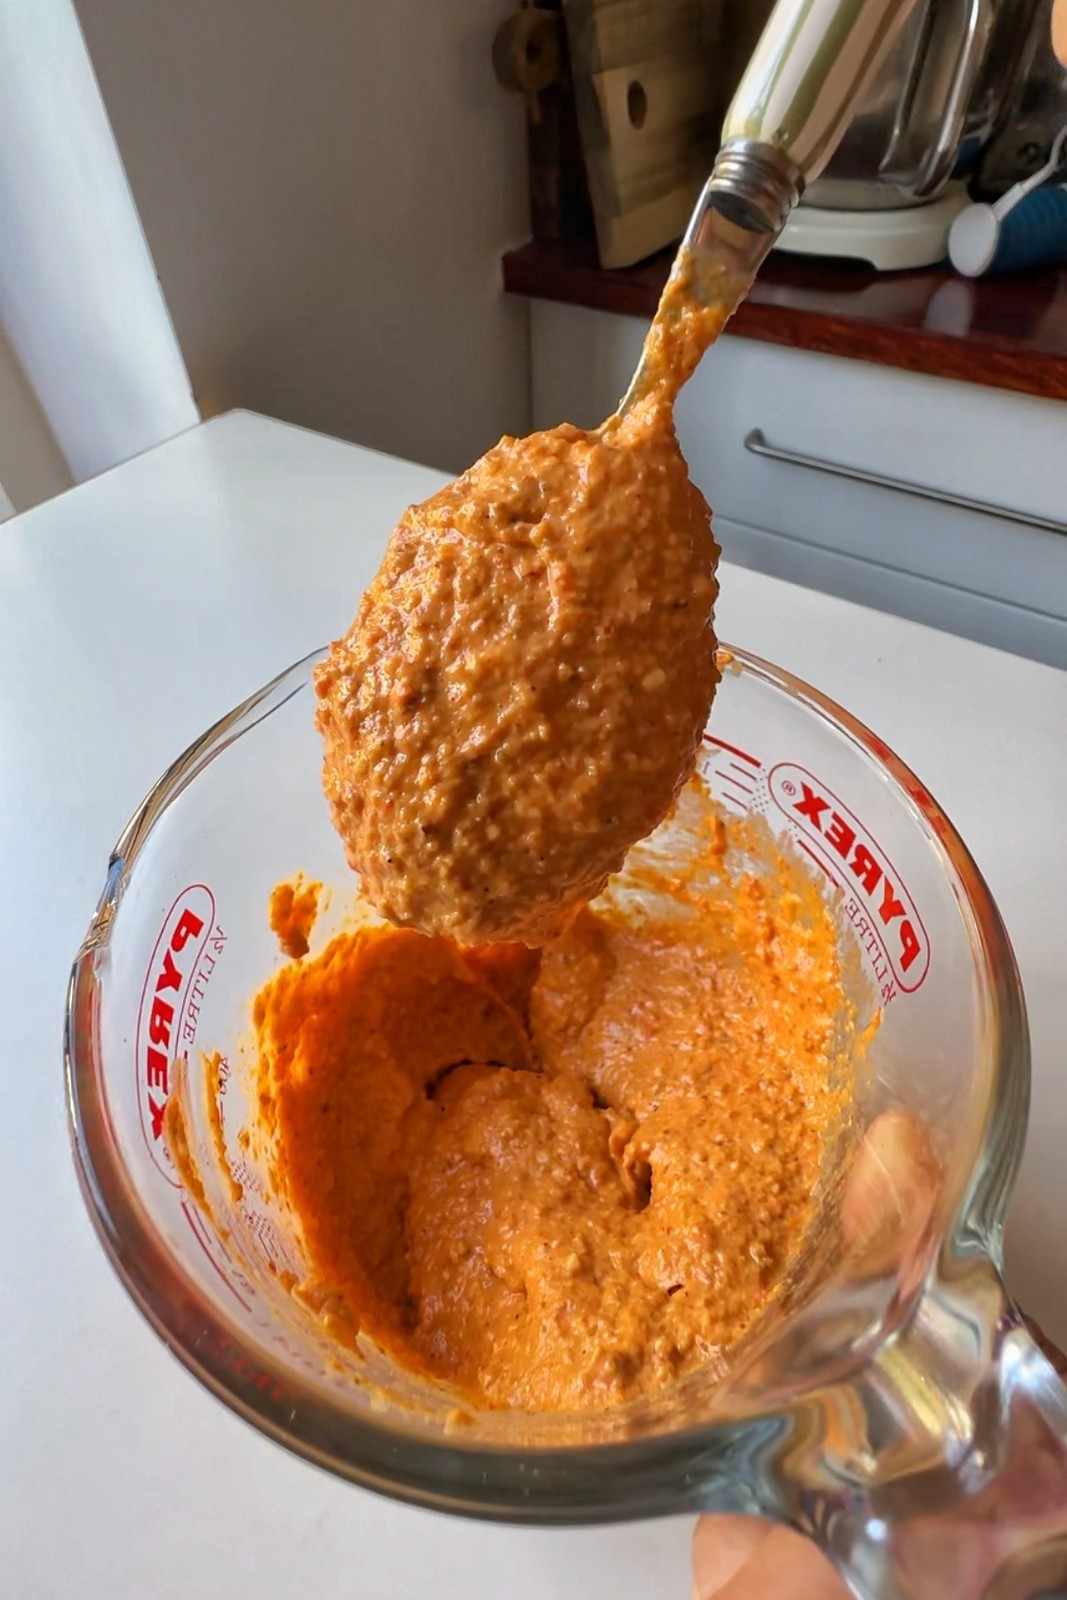
Step 4. Blend the romesco
While the chicken fries, blend the garlic, roasted peppers, sun-dried tomatoes, almonds, balsamic, paprika, olive oil, flaky salt and pepper until smooth, adding a splash of water if it's too thick to move. You want a sauce that drops off a spoon in a thick ribbon. Taste and season.
Step 5. Warm the romesco through
Microwave the sauce for a couple of minutes until piping hot, stirring once halfway. It thickens as it heats, so keep water nearby to loosen it back out.
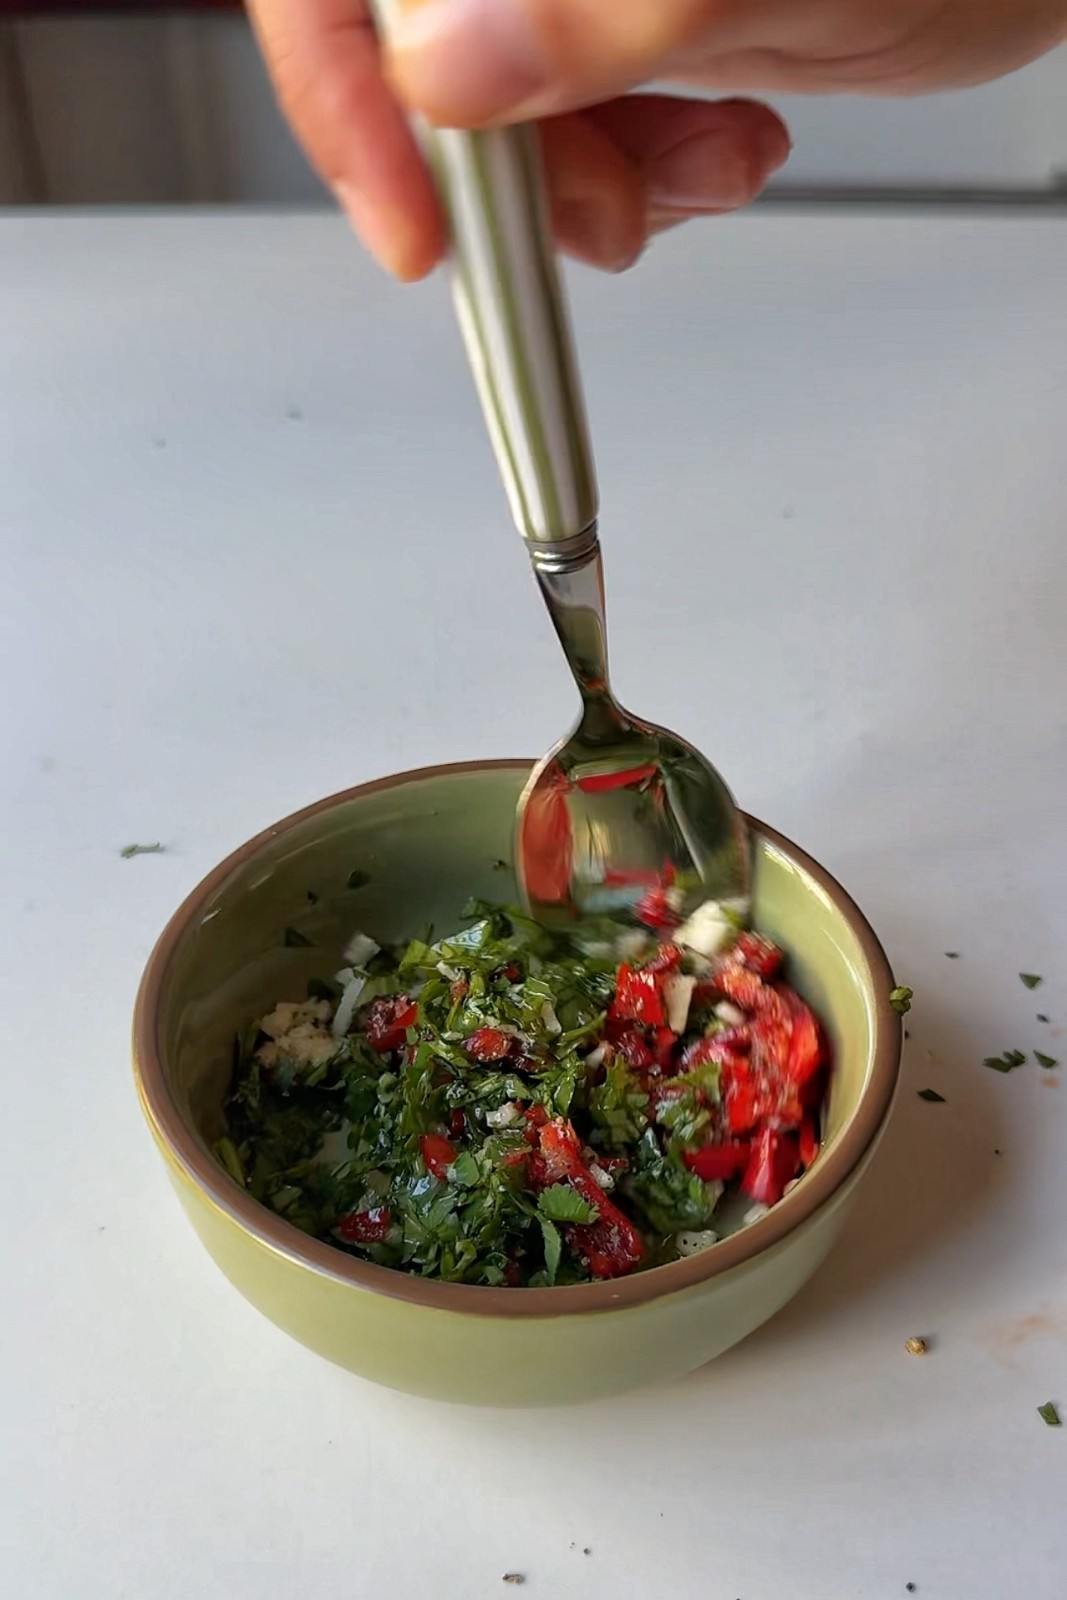
Step 6. Stir together the green sauce
Finely chop the cilantro, stalks and all, and tip it into a bowl with the grated garlic, chopped chili, olive oil, red wine vinegar, salt and pepper. Stir and taste. It should be sharp enough to make you go "oooooh", because it's cutting through a fried crust and a rich sauce.
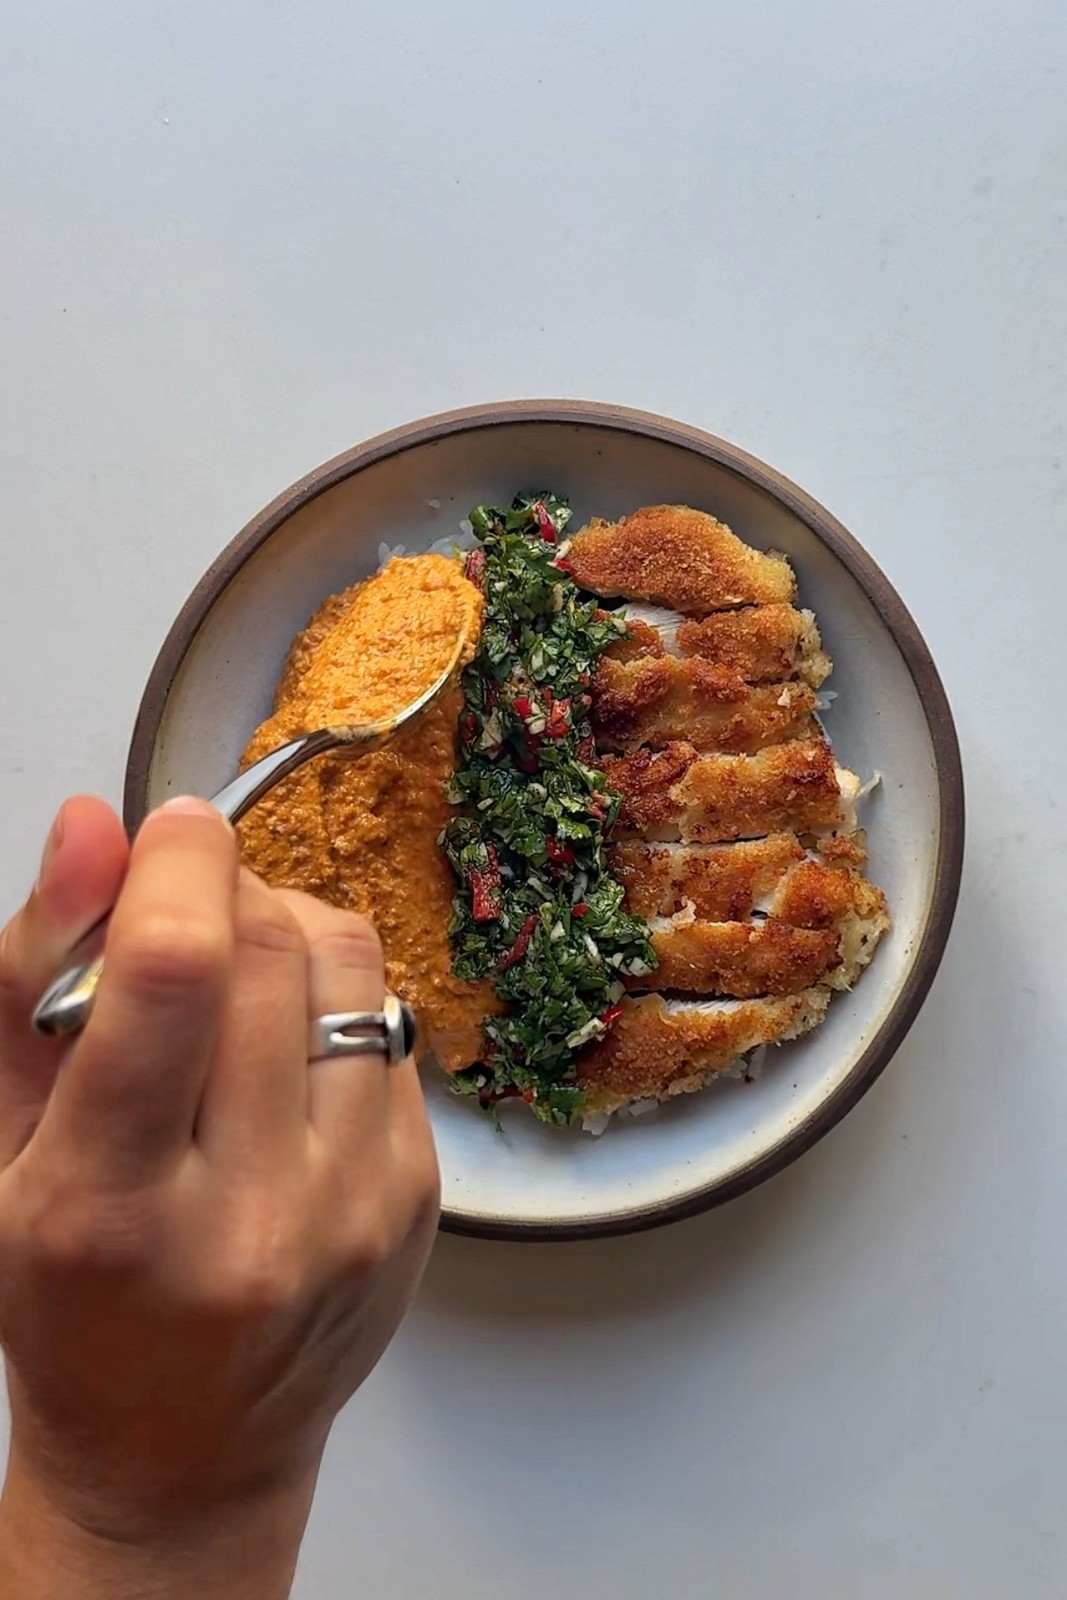
Step 7. Build your bowl
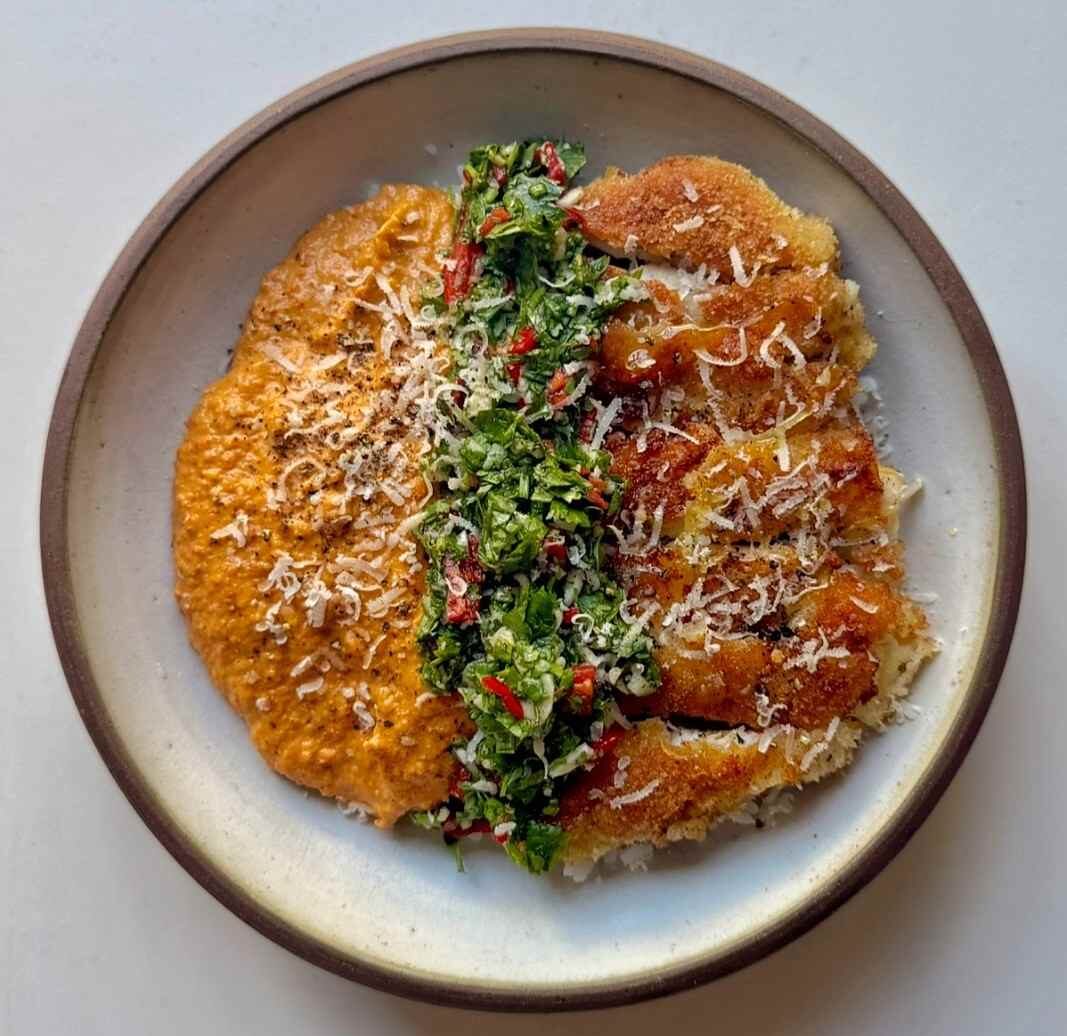
Spread the warm rice into a shallow bowl. Slice the chicken into thick strips and lay them over one side, then spoon the romesco over the other so the two meet in the middle. Spoon the green sauce down the join, grate over plenty of parmesan and grind over black pepper. Enjoy, my friends!
There you go! 7 simple steps and you're ready to enjoy your crispy romesco chicken with rice.
Tips for the best crispy romesco chicken
- Press the panko on, don't sprinkle it. Lay the chicken in the crumbs and push down firmly with your palm, then turn it and do the same. Pressing is what makes the coating stick through the fry rather than sliding off into the oil.
- Let the coated chicken sit for five minutes. Resting it on a plate before it hits the pan lets the flour hydrate and the layers settle together, and much less of it comes away in the oil, trust me on this one!
- Don't crowd the pan. Two thighs in a large skillet is about right. Any more and the oil temperature drops, so the crust absorbs it instead of crisping and you end up with greasy panko.
- Blend the romesco in a tall, narrow cup. A measuring cup and a an immersion blender break the almonds down far better than a wide bowl, where the sauce just sits around the blades. With a countertop blender, scrape the sides down once or twice.
- Season the green sauce more than you think. It's a dressing doing the work of a garnish, and against fried chicken and a sweet pepper sauce a timid version can disappear. Add salt and vinegar until it tastes almost too sharp on its own.
Substitutions and variations
If you want to make this recipe but don't have all of the ingredients or have certain dietary requirements then here are some ways to adapt the dish.
- Swap the chicken: Chicken breast works if you slice it horizontally into cutlets first. Pork loin steaks are excellent here too, and firm white fish takes about half the frying time.
- Swap the almonds: Hazelnuts are the other traditional romesco nut and give a rounder, sweeter sauce. Toasting either in a dry pan first deepens the flavor noticeably.
- Make it nut-free: Blend in a thick slice of stale bread, torn up, in place of the almonds.
- Make it gluten-free: Two swaps, gluten-free flour and gluten-free panko. The romesco and the green sauce are already gluten-free as they are.
- Change the base: Crushed new potatoes work as well as rice, and a pile of peppery arugula turns the whole thing into more of a salad plate.
Storage, freezing and reheating
The three parts keep very differently, so store them separately. The chicken keeps in an airtight container in the fridge for up to 3 days, though the coating softens. Bring it back in a hot oven or an air fryer at 400F (200C) for 5 to 6 minutes, which re-crisps the panko. A microwave will make it properly soggy, so I'd avoid it this time.
The romesco keeps for up to 5 days in a sealed jar and is one of those sauces that improves after a night in the fridge. It also freezes for up to 3 months. Top-tip, freeze it in an ice cube tray, then bag the cubes so you can defrost a couple at a time.
The green sauce is the one to make fresh. The vinegar dulls the cilantro within a few hours and by the next day it's gone dark and tired. It takes five minutes, so there's no real reason to get ahead on it.
Crispy romesco chicken FAQs
Yes, but slice each breast horizontally into two thinner cutlets first. A whole breast is too thick to cook through in the 5 minutes a side the crust needs, so you'd end up with a dark coating and raw chicken. Cutlets also give you more crispy surface per portion.
Usually one of three things. The chicken was wet when it went into the flour, so pat it dry first. The coating went into the pan with no time to settle, so give it five minutes. Or the chicken got moved around too early, so leave it alone for the full 5 minutes before you turn it.
Yes. Spray the coated chicken generously with oil on both sides and air fry at 390F (200C) for 18 to 20 minutes, turning halfway, until deep golden and cooked through. It won't be quite as evenly crisp as shallow frying, but it's close, and it's how I cook the panko chicken in my chicken katsu ramen.
No. Romesco is smoky and sweet rather than hot, and the paprika here adds color and depth rather than heat. If you want the plate spicier, it's the green sauce to adjust. Use a whole red chili instead of half, or leave the seeds in.
It's brilliant on almost anything roasted or grilled. Spoon it over charred broccoli or green beans, stir it through warm potatoes, pile it into a sandwich with more of that crispy chicken, or thin it with a little pasta water and toss it with short pasta the way I do with my roasted red pepper pasta sauce.
More crispy chicken and rice recipes
- One Pot Marry Me Chicken and Rice: chicken thighs and jasmine rice cooked together in a sun-dried tomato and parmesan sauce.
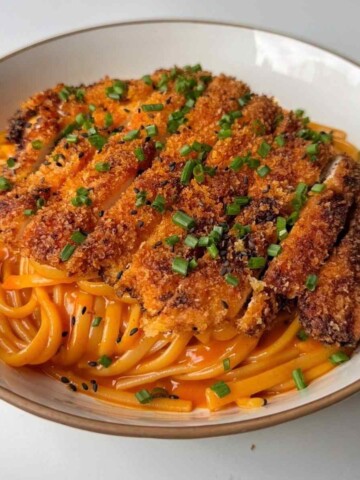
- Korean Fried Chicken Pasta: a crispy panko chicken cutlet on silky, sweet and spicy gochujang linguine.
- Easy Roasted Red Pepper Chicken: roasted peppers blended into a creamy, high-protein sauce.
- Chicken Piccata (the best version): floured cutlets pan-fried and finished in a lemon, caper and butter sauce.
- Leftover Chicken Recipes: 30 Ideas From Around the World: my full roundup for using up whatever's left.
If you tried this Crispy Romesco Chicken With Rice recipe or any other recipe on my website, please leave a 🌟 star rating and let me know how it went in the 📝 comments below. Thank you!
Crispy Romesco Chicken With Rice
Ingredients
For the crispy chicken
- 2 chicken thighs skinless and boneless
- ¾ cup all-purpose flour 100g
- Salt and black pepper to season the flour
- 1 egg whisked
- 2 cups panko breadcrumbs 100g
- Vegetable oil for frying
For the romesco sauce
- 1 garlic clove
- 2 jarred roasted bell peppers drained
- 4 sun-dried tomatoes
- ⅓ cup almonds 50g
- 1 teaspoon balsamic vinegar
- ½ teaspoon paprika
- 3 tablespoon olive oil
- Pinch of flaky salt
- Black pepper to taste
For the green sauce
- ¼ cup finely chopped cilantro 7g
- 1 garlic clove grated
- ½ red chili finely chopped
- 2 tablespoon olive oil
- 1 tablespoon red wine vinegar
- Salt and black pepper to taste
To serve
- 2 portions cooked jasmine rice about 1 cup / 160g cooked each
- Parmesan for grating
Instructions
- Set out three plates: one with the flour seasoned well with salt and pepper, one with the whisked egg, and one with the panko.
- Press a chicken thigh into the flour on both sides, shake off the excess, dip into the egg, then press firmly into the panko. Repeat all three coatings a second time so the chicken has a thick crust. Set aside and repeat with the second thigh.
- Pour enough vegetable oil into a large skillet to cover the base and set over medium heat. To check the oil is hot, stand a wooden chopstick in the pan touching the base; if bubbles form around it, it's ready. Fry the chicken for 5 minutes a side until deep golden, lowering the heat if it colors too quickly. Drain on paper towels.
- Meanwhile, blend the garlic, roasted peppers, sun-dried tomatoes, almonds, balsamic vinegar, paprika, olive oil, flaky salt and black pepper until smooth. Add a splash of water if the sauce is too thick, then taste and season.
- Microwave the romesco for a couple of minutes until piping hot, stirring once halfway. Loosen with a little more water if it has thickened.
- Finely chop the cilantro and stir it together with the grated garlic, chopped chili, olive oil, red wine vinegar, salt and pepper. Taste and season; it should taste sharp and slightly spicy!
- Spread the cooked rice into a shallow bowl. Slice the chicken into thick strips and lay it over one side, spoon the romesco over the other, then spoon the green sauce down the middle. Grate over parmesan, add black pepper and serve. Enjoy, my friends!
Notes
- Step-by-step photos are in the blog post above.
- Coating the chicken twice is what keeps the crust crunchy under the sauce. Don't skip the second coating.
- Storage: store the three parts separately. Chicken keeps 3 days and re-crisps at 400F (200C) for 5 to 6 minutes. Romesco keeps 5 days or freezes for 3 months in an ice cube tray. Make the green sauce fresh.
- Swaps: chicken breast sliced into cutlets; hazelnuts for almonds; flat-leaf parsley for cilantro; gluten-free flour and panko.
Nutrition
Always see my recipes in Google
One tap adds Myriad Recipes to your preferred sources, so my recipes show up more often when you're hunting for dinner ideas.
Leave a Reply